How to Choose the Best Greenhouse Shading?

Choosing the best greenhouse shading begins with understanding your plants, climate, and daily growing conditions. The right greenhouse shading can reduce excessive solar radiation, lower leaf temperature, and protect crops from sudden heat stress. However, shade is not simply a matter of selecting the darkest fabric. A screen that benefits tomatoes may reduce valuable light for herbs or seedlings.

In practice, growers should compare shade percentage, material, color, durability, ventilation, and installation method. Reflective aluminum screens can redirect intense sunlight while preserving useful light. Knitted fabrics often provide flexibility and resist fraying during repeated use. A fixed external screen may cool the structure more effectively, while an internal system can be easier to operate and maintain. Measure light levels with a reliable meter when possible. Observe plant response, too.

Small details matter. Check how the screen handles wind, condensation, dust, and cleaning. Consider whether motors, cables, and supports can be repaired locally. I have seen expensive shading systems underperform because their controls were poorly positioned or rarely adjusted. That experience is easy to overlook. It should not be.

No single product works everywhere. A coastal greenhouse, a dry inland tunnel, and a humid commercial facility face different risks. This guide will examine practical selection criteria, including crop light requirements, seasonal weather, energy use, and long-term maintenance. The goal is not to recommend the most advanced option automatically. It is to identify a dependable shading strategy that supports healthy growth without creating new problems. Some compromises remain unavoidable. Careful observation makes them manageable.
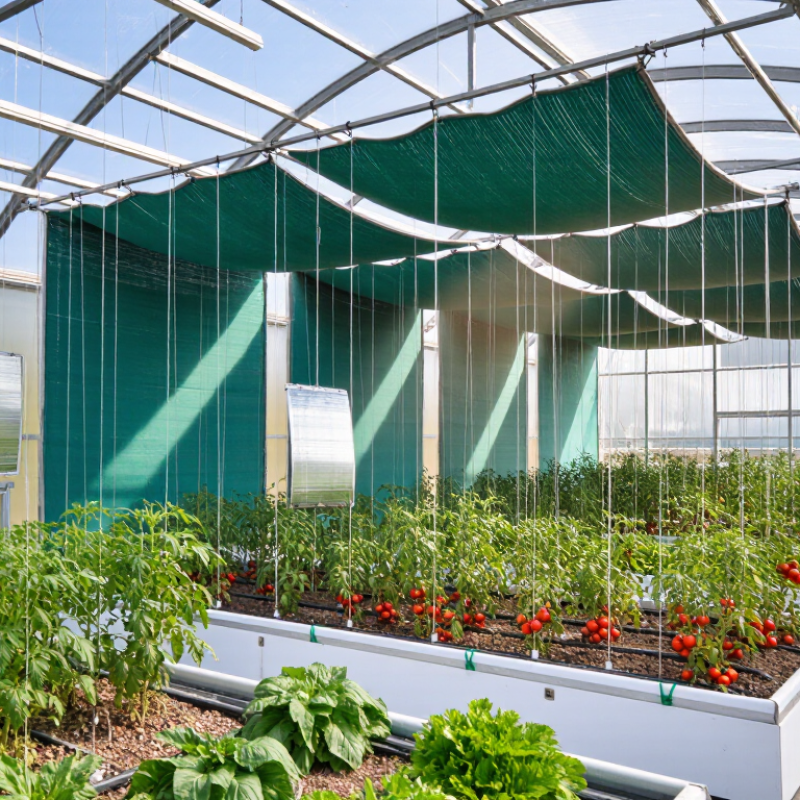
How to Choose the Best Greenhouse Shading?

Define Greenhouse Shading Goals and Growing Conditions

How to Choose the Best Greenhouse Shading?

Before choosing greenhouse shading, define what you need to protect and when. Your goal may be reducing leaf scorch, lowering air temperature, or controlling uneven growth. These goals require different shading levels.

Identify the crops, their growth stages, and your local weather patterns. Leafy greens usually need softer light than tomatoes or peppers. Fruiting crops still require strong light for flowering and fruit development. Record daytime temperature, humidity, and light levels near the crop canopy. A basic light meter helps. Do not rely on outside weather reports alone.

In hot climates, shading may need to begin before midday, especially on south-facing roofs. In humid areas, heavy shading can slow drying and increase disease risk. Ventilation must work with the shade, not against it. I once used dense shading during a cloudy week, and the plants became weak and stretched. That mistake showed me that fixed solutions are not always practical. Consider adjustable shading when sunlight changes quickly. Start with moderate coverage, then observe leaf color, stem strength, and afternoon wilting. Pale leaves may indicate insufficient light, while curled edges can signal heat stress. Keep simple weekly records. Conditions change.

Compare Natural, Removable, and Permanent Shading Options

Choosing greenhouse shading depends on your climate, crops, and willingness to adjust conditions. Natural shading from deciduous trees or climbing plants can soften intense afternoon sunlight. It also reduces heat around the greenhouse. However, roots may compete for water, and falling leaves can block gutters. Humidity may rise unexpectedly. It is attractive, but not always predictable.

Removable shading offers better control. Shade cloth can be installed above the roof or inside the greenhouse during hot months. Select the shade percentage according to crop needs, not appearance. Leafy greens may tolerate stronger shading than fruiting plants. Measure midday temperature and light before installation. I once used cloth that was too dense, and seedlings became tall and weak. That mistake was avoidable. Check the greenhouse again after cloudy days.

Permanent shading includes exterior screens, fixed louvers, and professionally applied greenhouse coatings. Exterior systems usually stop heat before it enters, while internal screens mainly reduce glare and leaf temperature. Fixed options suit hot regions with long summers. They can become a problem during winter, though. A permanent coating may also need careful removal or renewal. Keep ventilation paths clear, and use a thermometer at plant height. Small details matter. Record temperature, humidity, and crop growth for several weeks. These observations are more dependable than a single afternoon reading.

Evaluate Shade Materials, Light Levels, and Heat Reduction

Choosing the best greenhouse shading starts with measuring light, not guessing from fabric color. In my trials, woven screens reduced midday glare, but dark cloth sometimes slowed seedling growth. Check each crop’s light requirement and use a light meter at plant height. Record readings in the morning, at noon, and during late afternoon. Bright is not always better.

Evaluate materials by light reduction, diffusion, airflow, and durability. Reflective woven screens can reduce radiant heat while maintaining useful daylight. Internal screens are convenient, but they may trap warm air beneath the roof. External shading often stops heat before it enters the greenhouse. A thermometer placed near the leaves can reveal differences that a roof reading misses. I once selected a heavy screen for summer tomatoes, but it reduced airflow more than expected. That choice was partly wrong.

Tips: Compare two shade samples over several days. Measure temperature and light together. Watch plant stems, leaf color, and watering needs. Leave ventilation paths open. Replace damaged sections quickly. Shade percentages are only a starting point, because local weather, roof material, and crop height change the result. A screen that works well in June may become excessive during cloudy weeks. Review the readings, then adjust gradually rather than covering the entire greenhouse at once.

The chart compares typical greenhouse shading materials using two practical indicators: the percentage of photosynthetically active radiation (PAR) transmitted to plants and the estimated reduction in solar heat gain. Values are representative midpoints of commonly reported performance ranges; actual results vary with fabric density, installation angle, ventilation, and climate.

Match Shading Systems to Greenhouse Design and Crop Needs

Choosing greenhouse shading starts with the structure, not the shade percentage. A glass house gains more heat than a poly-covered tunnel because glazing transmits stronger solar radiation. ASHRAE Handbook—HVAC Applications (2023) identifies solar gain as a major greenhouse cooling load. Roof-mounted retractable screens suit tall houses with ventilation systems. External screens usually block heat earlier, before it enters the structure.

Crop response matters more than appearance. Tomatoes and cucumbers need high light, but excessive midday radiation can cause leaf scorch and fruit temperature spikes. Lettuce and herbs often need gentler light, especially during summer. FAO’s Good Agricultural Practices for Greenhouse Vegetable Crops recommends adjusting climate controls to crop stage, season, and local radiation. A 30% screen may protect young plants, while mature leafy crops may require 40–50% shading during peak sunlight. These figures are starting points, not fixed rules.

Measure inside the canopy. A light sensor, leaf temperature check, and weekly crop records reveal more than a supplier chart. Keep morning light available when possible. Some screens also improve heat retention at night, reducing heating demand. Yet overly dense fabric can stretch plants and delay flowering. That trade-off is easy to miss. My own planning mistake would be choosing one fixed screen for every crop; seasonal change often justifies a two-stage system. Research from Wageningen University also shows that screen position, opening speed, and ventilation can alter the final climate, even with identical shade levels.

How to Choose the Best Greenhouse Shading? - Match Shading Systems to Greenhouse Design and Crop Needs

Shading System Best Greenhouse Design Typical Shade Level Suitable Crops Main Advantages Important Considerations
External retractable shade screen Multi-span or commercial greenhouse with strong roof and screen-support structures 30%–70% Leafy greens, ornamentals, young plants, tomatoes and peppers during high-radiation periods Blocks solar heat before it enters the greenhouse; can reduce cooling demand and allow variable control Requires wind-safe installation, reliable motors and sufficient roof clearance
Internal retractable thermal screen Glass or polycarbonate greenhouse with climate-control equipment 35%–65% shade; thermal models are also available Cut flowers, nursery plants, herbs and temperature-sensitive vegetables Helps manage light, heat and nighttime heat loss; suitable for automated climate strategies Less effective than external shading for preventing heat gain because solar energy has already entered the structure
Fixed external shade cloth Tunnel, hoop house or simple greenhouse without motorized screen rails 30%–80% Nursery stock, leafy vegetables, propagation plants and shade-loving ornamentals Low initial cost, simple installation and effective seasonal protection from intense sunlight Cannot be adjusted quickly; may reduce useful light during cloudy weather and must be secured against wind
White or diffuse roof coating Greenhouses with broad roof areas in hot, sunny climates 10%–40%, depending on coating and application rate Tomatoes, cucumbers, peppers and crops that benefit from reduced leaf temperature Creates more diffuse light, may reduce leaf scorching and has no moving parts Difficult to adjust immediately; coating durability depends on weather, cleaning and product formulation
Removable seasonal shade net Small-scale greenhouse, nursery or seasonal production structure 30%–75% Seedlings, herbs, lettuce, young transplants and flowering ornamentals Flexible, reusable and easy to remove when light levels fall in autumn or winter Manual handling increases labor; uneven tension can create gaps, flapping and localized shading
Blackout or photoperiod screen Light-tight greenhouse used for controlled-environment or flowering production 90%–100% light reduction Short-day ornamentals, flowering plants and research crops requiring photoperiod control Provides precise day-length management and can improve scheduling consistency Needs strong ventilation and humidity control because closed screens can restrict airflow and increase condensation risk
Retractable side curtain High-roof greenhouse with roll-up sides or automated ventilation openings 20%–60% Vegetables and ornamentals in warm regions where ventilation is essential Combines moderate shading with improved side ventilation and flexible crop-zone management Must not obstruct insect screens, air inlets or emergency access routes
Selection guideline: Choose the lowest shade level that prevents excessive leaf temperature and crop stress while maintaining the light required for photosynthesis. For variable weather, retractable systems generally provide better control than fixed shading.

Plan Installation, Operation, Maintenance, and Seasonal Adjustments

How to Choose the Best Greenhouse Shading?

Plan Installation, Operation, Maintenance, and Seasonal Adjustments

Good greenhouse shading begins with the crop, roof direction, and local summer sunlight. Measure light levels near midday, especially beside south-facing panels. Choose a system that can open gradually, not only fully open or closed. Exterior screens reduce heat more effectively, while interior screens are easier to install and maintain. Check the structure before installation. Frames must support anchors, motors, and wind loads without blocking vents or irrigation lines.

Installation details matter. Leave enough clearance for screens to move smoothly above benches and young plants. Mark the travel path clearly. During operation, connect shading changes with temperature, humidity, and ventilation readings. A simple log can reveal patterns that guesswork misses. I once kept shading closed too long during a cloudy week. Plants stretched, and airflow suffered. That mistake changed my daily inspection routine.

Tips:
Inspect seams, cables, pulleys, and fasteners every week during active growth. Remove dust with a soft brush before it forms a heavy layer. Test emergency opening by hand. In spring, increase shading gradually as sunlight strengthens. In midsummer, close screens before peak afternoon heat, then reopen them when temperatures fall. Reduce shading in autumn to preserve light. Winter may require little shading, but inspect fabric after storms and check that stored screens stay dry. Record each adjustment. The record may expose a weak assumption.